Create and Practice a Custom Scenario as a Standard User
To create a custom scenario as a standard user, please log into Tenor and follow these steps:
-
Open the Scenario Library
Navigate to the Scenario Library and click Create Custom Scenario.

-
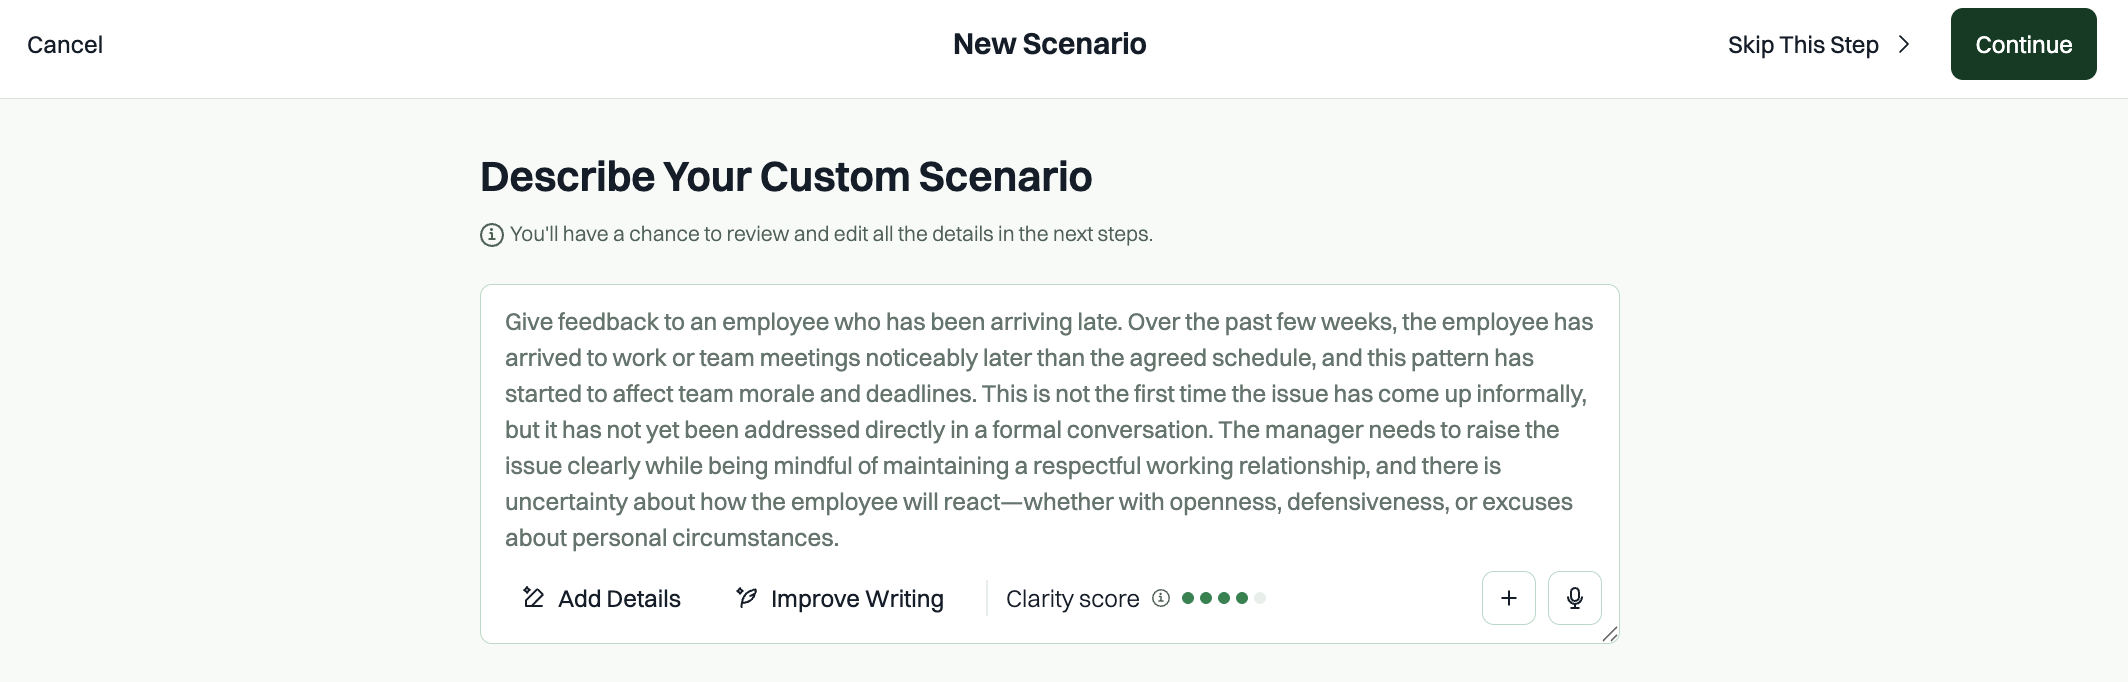
Describe your custom scenario: type a quick phrase describing what you want to practice — for example, "Give feedback to an employee who has been arriving late." You'll have a chance to review and edit every detail in the next steps, so it doesn't need to be perfect. On this screen, you can:
- Add Details — AI suggests extra context; review the suggestions and approve the ones that make sense.
- Improve Writing — AI rewrites your prompt to make it clearer and more complete.
- Clarity score — shows how clear your prompt is (low to high) and explains what's driving the score.
- + (attach) — add a link or upload a file to give the AI more source material.
- (dictate) — speak instead of typing, and the AI writes it out for you.
-
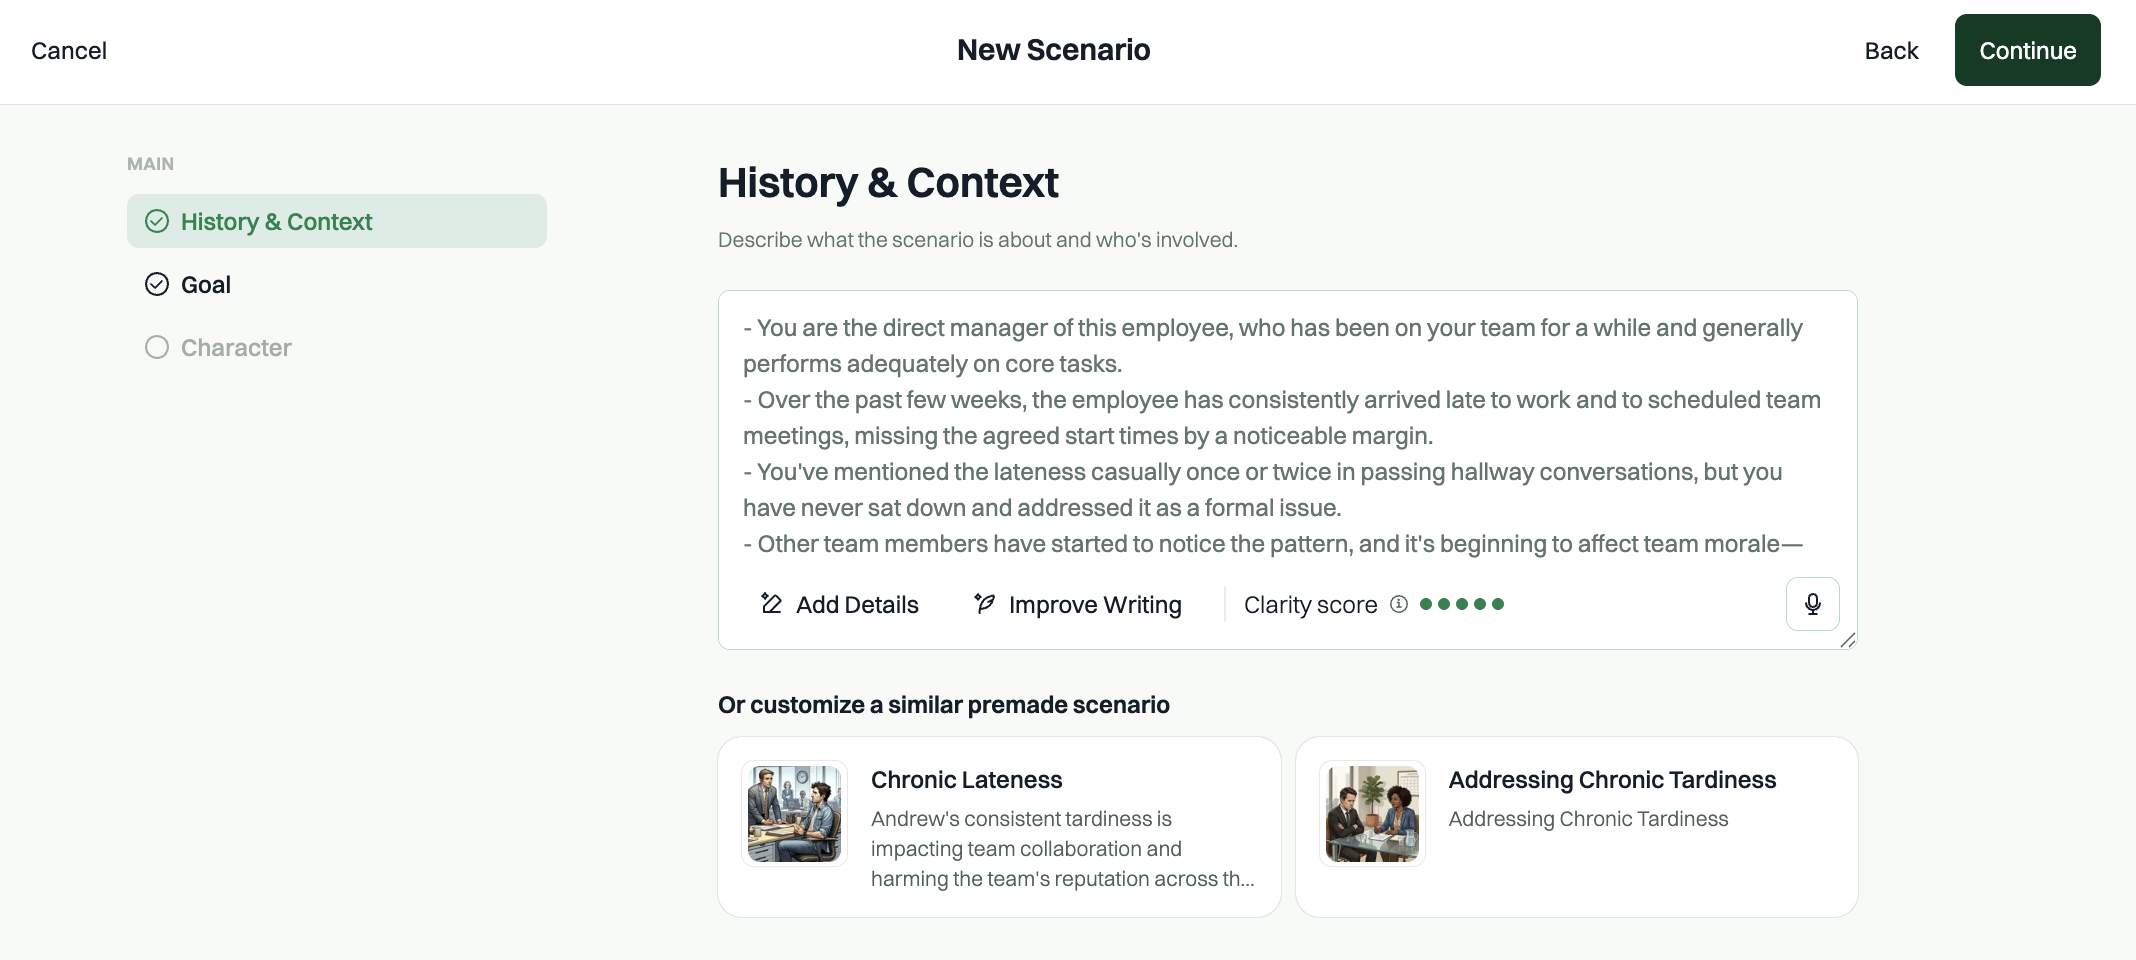
Review History & Context: based on what you described, Tenor generates the scenario's background — who's involved, what's happened so far, and the current situation. You can edit the points directly, use Add Details, Improve Writing, or dictate, and you'll see the Clarity score here too.
Under "Or customize a similar premade scenario", you'll also see existing scenarios from your organization's library that closely match what you're building. If one of them is a better starting point, select it instead of building from scratch — otherwise, keep going with your new scenario and click Continue.
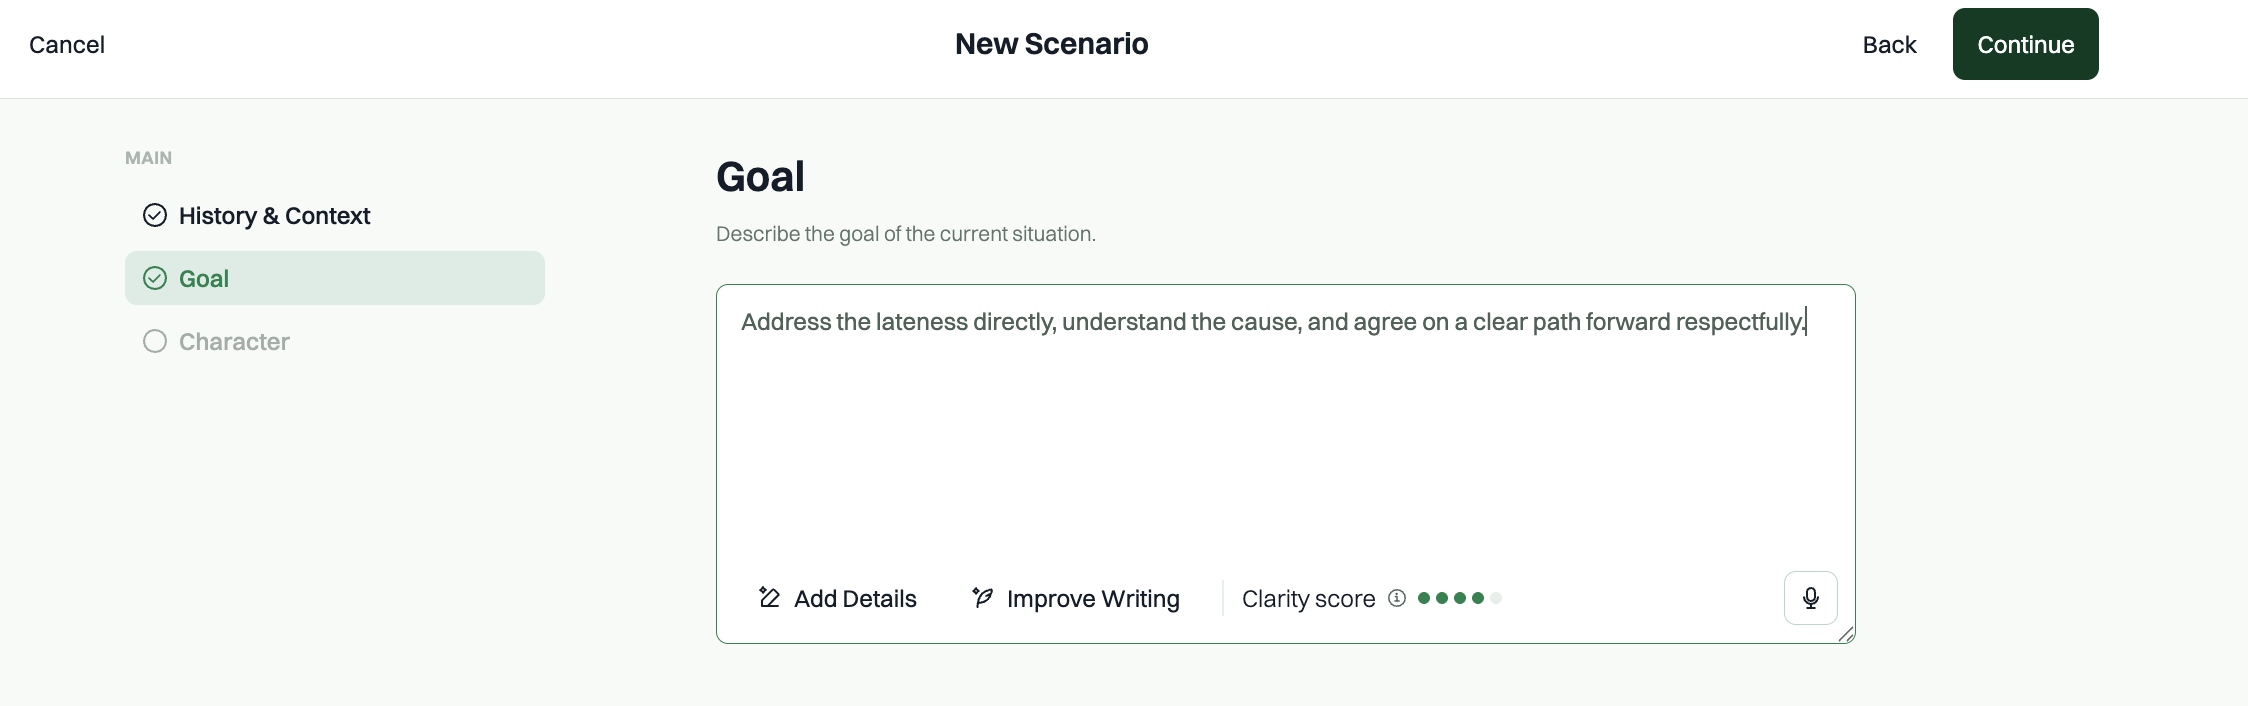
- Set the Goal: define what you want to accomplish in the conversation. The same tools are available here: Add Details, Improve Writing, dictation, and the Clarity score. Click Continue.
-
Choose a Character: Tenor generates three pre-made characters tailored to your scenario, each with a different personality and mood. You can:
- Choose one of them as-is.
- Select one and customize it (name, job title, relationship to you, mood, personality).
- Click Add Custom Character to build one from scratch.
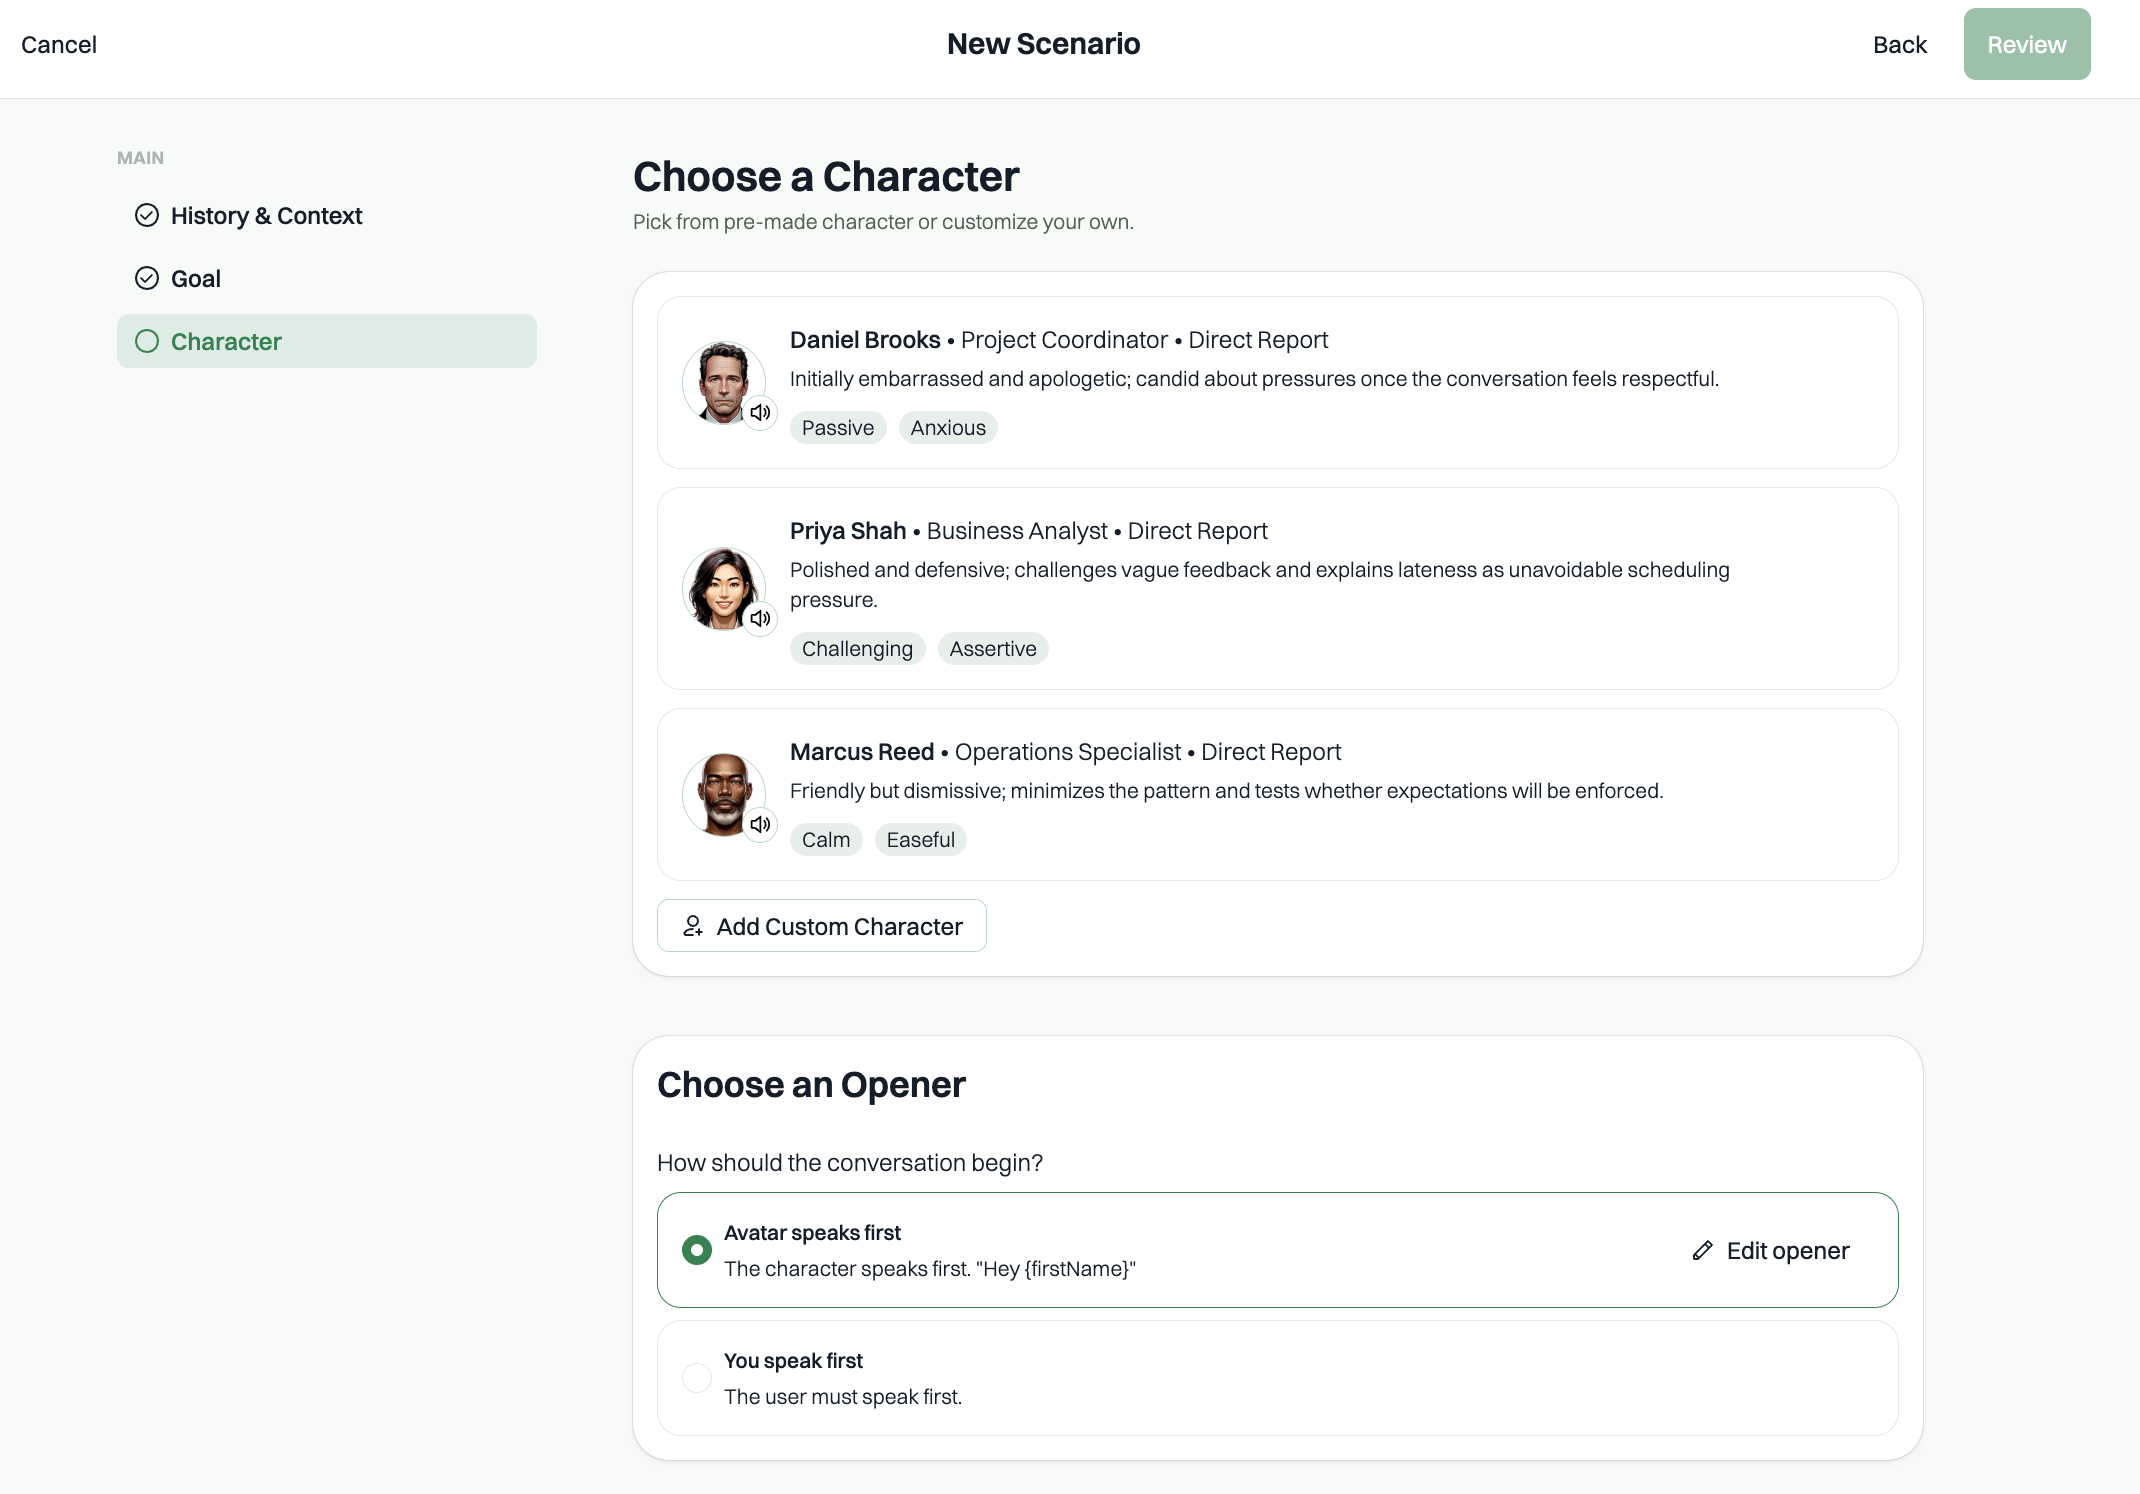
You can also choose an opener and decide how the conversation begins — Avatar speaks first or You speak first. If the avatar speaks first, click Edit opener to customize the opening line; use the {firstName} placeholder to have the character say the learner's name. Click Continue.
-
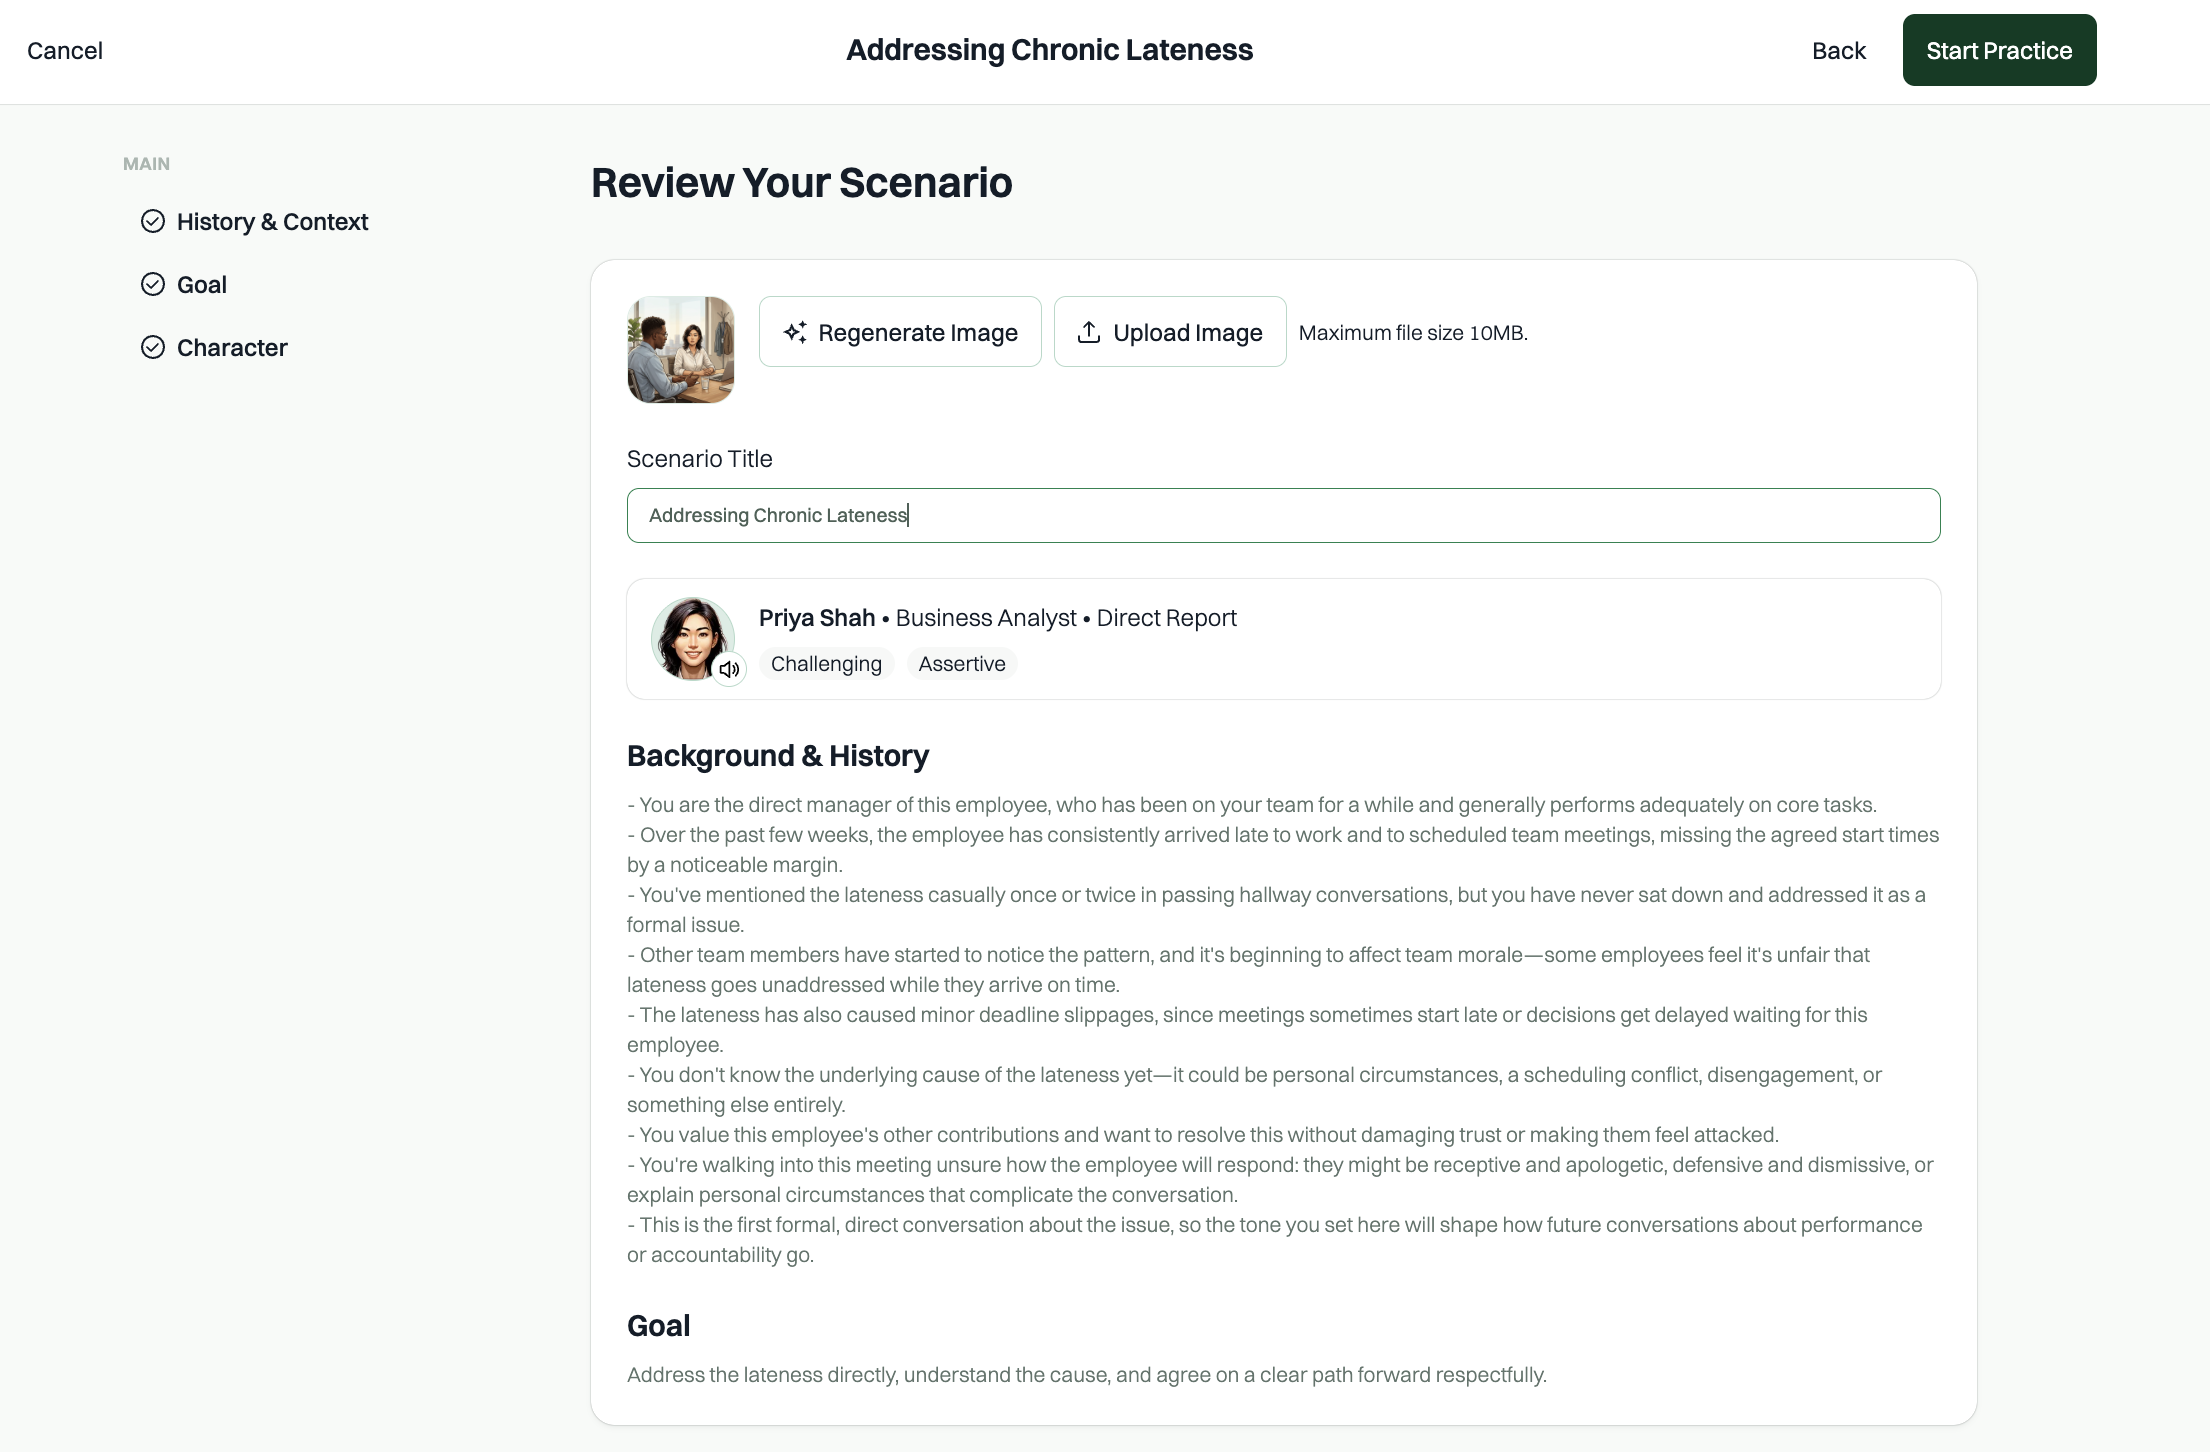
Review and save: on the review screen, you'll see the full scenario: the generated image, the title, the character you'll be speaking with, the background & history, and the goal. Here you can:
- Regenerate Image or Upload Image (max 10MB).
- Edit the Scenario Title.